
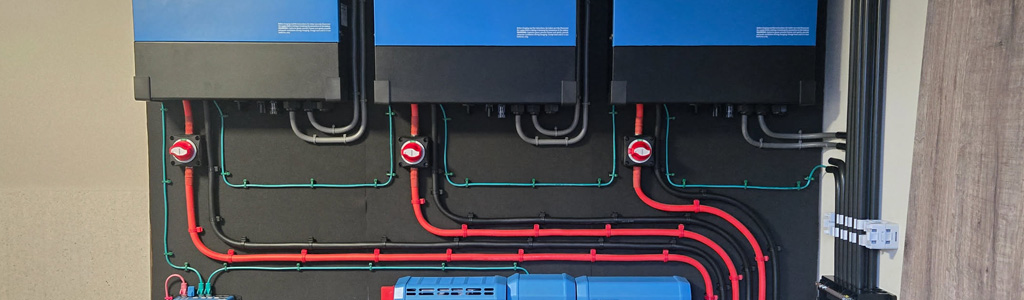
I’ve designed and built a complete Victron home battery setup over the past half year and a few days ago my (certified) electrician connected it and brought it online. A different post will be dedicated on the whole process from start to end, but I ran into something that I was sure I would forget if it wasn’t documented. Good reason for a blog post!
The issue
I’ve only been playing with the Victron ecosystem for a few days since my system came online. One of the first things I wanted to do right after turning the system on was stopping the Multi RS from trying to fill up the batteries immediately. Naturally I was searching for some kind of limit but couldn’t find it. After configuring the system in ESS mode and effectively stopping the charging process, which was all done through the Victron Connect app on my phone, I found my way through the Multi RS settings and noticed an option in Settings/ESS called Grid Setpoint. This option let me charge or discharge the batteries on command and at whatever power level I requested.
After all the configuration with the Victron Connect app on Bluetooth was finished, it was time to move out of range and work from my computer. But wherever I looked, the Grid Setpoint option was nowhere to be found within the Cerbo GX system. Searching the web only gave results for MultiPlus units which work with the VE.Connect application, Multi RS is newer and does not use this. The options in the Cerbo GX console are also different for the Multi RS, normally Settings/ESS would give the Grid Setpoint option for MultiPlus units. Looking at this configuration path with the Multi RS, the Cerbo simply says you manage ESS from the device itself. However, going to the device configuration through the Cerbo GX will show everything from the menu the Victron Connect app shows, except for the Grid Setpoint…
So, it seems the only way to configure this is to stand near the Multi RS, connect bluetooth and configure the Grid Setpoint there. That’s extremely annoying and impossible to automate.
Enter Node-Red
Even while only reading up on how to build an ESS I already noticed a lot of Node-Red programming going on for all kinds of different and additional functionality. I figured I would need Node-Red for Victron in the future anyway and decided to take a look at the options there. Instead of using my already existing Node-Red installation, it’s a wiser decision to keep the ESS functionality on the ESS instead of creating a liability outside of the system.
Installing Node-Red on the Cerbo GX sounds complicated but was very easy in the end. All that needs to be done is set the Cerbo GX firmware image to Venus OS Large and run an update. When the update completes, Node-Red can be activated in the Settings/Integrations menu, section Venus OS Large Features.
For more info on this see the Victron Documentation: Venus OS Large ⧉
Controlling the Grid Setpoint
Using the Victron palettes Custom Control node, devices and paths can be selected to deliver a payload to. In this case, from the Custom dropdown, select the Multi RS, or in case there is a 3-phase setup select the RS system group. From the Measurement dropdown, select the path Ess/AcPowerSetpoint and click “Done” to save the node. Now we have the endpoint/node ready to send data to the ESS for the Grid Setpoint. It accepts Numeric values only and it can be postive, zero or negative values.
Setting a negative value of
-3000will instruct the Multi RS to discharge 3000W to the Grid. Setting a positive value of3000will charge 3000W from the Grid. Zero will keep the Grid at 0W where possible. If you have multiple Multi RS and set this at the RS system level, this value is the total amount of Watts for the whole system. So in case of3000, with a 3-phase setup, all three Multi RS will do 1000W each.
1
2
3
4
5
6
7
8
9
10
11
12
13
14
15
16
17
18
19
20
21
22
23
24
25
26
27
28
29
30
31
32
33
34
35
36
37
38
39
40
41
42
43
44
45
46
[
    {
        "id": "65b009f242997e83",
        "type": "victron-output-custom",
        "z": "70ce9d0549dfd736",
        "service": "com.victronenergy.acsystem/0",
        "path": "/Ess/AcPowerSetpoint",
        "serviceObj": {
            "service": "com.victronenergy.acsystem/0",
            "name": "RS system (0) (0)"
        },
        "pathObj": {
            "path": "/Ess/AcPowerSetpoint",
            "name": "/Ess/AcPowerSetpoint",
            "type": "number",
            "value": 12000
        },
        "name": "",
        "onlyChanges": false,
        "roundValues": "no",
        "rateLimit": 0,
        "outputs": 0,
        "conditionalMode": false,
        "condition1Operator": ">",
        "condition2Enabled": false,
        "condition2Service": "",
        "condition2Path": "",
        "condition2Operator": ">",
        "logicOperator": "AND",
        "outputTrue": "true",
        "outputFalse": "false",
        "outputOnChange": false,
        "debounce": 2000,
        "x": 620,
        "y": 160,
        "wires": []
    },
    {
        "id": "8cc768282200f802",
        "type": "global-config",
        "env": [],
        "modules": {
            "@victronenergy/node-red-contrib-victron": "1.6.64"
        }
    }
]
Using an Inject node (Default/Common Node-Red node) for testing purposes, set the msg.payload to a value for the Grid Setpoint to set and make sure you select Number from the dropdown menu behind the =. Remove all other properties in the list, only have msg.payload in there. Click on the “Done” button to save the node.
1
2
3
4
5
6
7
8
9
10
11
12
13
14
15
16
17
18
19
20
21
22
23
24
25
26
27
[
    {
        "id": "7f08d340c57092ff",
        "type": "inject",
        "z": "70ce9d0549dfd736",
        "name": "",
        "props": [
            {
                "p": "payload"
            }
        ],
        "repeat": "29",
        "crontab": "",
        "once": true,
        "onceDelay": 0.1,
        "topic": "",
        "payload": "-10000",
        "payloadType": "num",
        "x": 200,
        "y": 160,
        "wires": [
            [
                "65b009f242997e83"
            ]
        ]
    }
]
Now connect the Inject node to the Custom Control node and hit the Deploy button to activate the flow. Now all that’s left to do is click the Inject node to send the configured value to the Multi RS. As soon as you click the node, the Multi RS should adjust accordingly.
Victron Grid Setpoint/AcPowerSetpoint resets after 30 seconds
Unlike the Multi RS settings configured through the Victron Connect app, the Custom Control Node path for the Grid Setpoint used above is not persistent. Looking at the path of a single Multi RS unit will show (null) being added to the path, which means this value will default to NULL after 30 seconds. To make sure the Grid Setpoint persists, the message will have to be sent in a loop. A sharp eye may have already noticed on the Inject node JSON above, I’ve fixed it by injecting the value on a repeat interval every 29 seconds to make sure it refreshes before the 30 second reset to NULL. Simply disable the Inject node and the Multi RS will reset the Grid Setpoint after 30 seconds.
Conclusion
Well, this ended up a lot longer than I was expecting for such a simple task, I hope it helps! As I am still very new and (somewhat) uncomfortable with Victron software, there may be better ways to do this that I don’t know about yet. If you know of a better way, feel free to leave a comment!